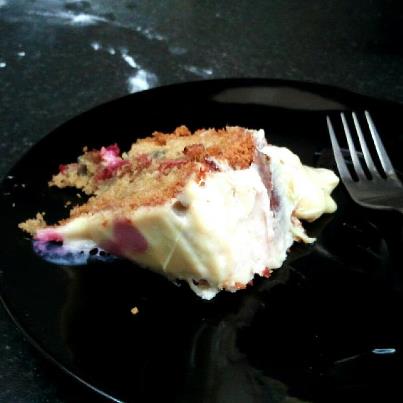
easy carrot 'n' lime traybake

© Lydia, punge.blogspot.co.uk

Jack is off to Oz for 6 months!

Jack is one of my colleagues.

Jack likes carrot cake.

See Jack eat carrot cake.


I wasn't a fan of carrot cake as a kid, and it wasn't until I started baking it myself that I realised it was because I'm not a huge fan of walnuts, a typical staple ingredient of this classic cake. The reason I don't seek out walnuts is that they seem to have an incredibly short shelf-life, turning rancid-tasting (to me) in a very short space of time. Even when fresh I don't particularly like them, I find them quite bitter. And even in a fresh pack, there's bound to be one or two that have crossed over to the rancid category. So I tend to steer clear of them. I'm a much bigger fan of pecans, and one day, when their price climbs down from the mountain it's currently perched on, I'll start experimenting with all things pecan-y, but for now, no nuts it is. Which can be handy if you / someone your baking for happens to be allergic to nuts.

I like to substitute nuts for raisins (and use wholemeal flour for a nuttier taste and texture), as the extra moistness can't be a bad thing. And I have a lot of raisin-love to spread. Not like that. I also love cinnamon, and you can't go wrong with a bit of lime zest in my opinion, even if the classic pairing for carrot cake is orange zest. This recipe is adapted from the Hummingbird Bakery Cookbook (recipe here via ocado website, legally reproduced, I hope), should you want to have a look.

So here it is, a SUPER EASY (enjoy it while it lasts!), MEGA-CINNAMON CARROT & LIME TRAYBAKE.

Incidentally, I used this cake as part of a wedding cake before, it formed the largest tier and went down a treat. If you're making this in advance or need it to last longer e.g. for a wedding, I'd pair it with the white chocolate buttercream instead (on the "frost me" page), so you don't have to worry about the shelf-life of the cream-cheese frosting.

© Lydia, punge.blogspot.co.uk


Lydia's Hummingbird Bakery-based Carrot & Lime Traybake (easy! serves 8-16)
Ingredients
Cake batter
200g (somewhere between 1 and 1¼ cups) soft light brown sugar
2 eggs
200ml (just over ¾ cup) sunflower/vegetable oil
200g (1 cups) wholemeal plain flour
2 tsp cinnamon
1 tsp ground ginger
 tsp bicarbonate of soda
 tsp baking powder
¼ tsp salt
200g (7 oz, about 3 small to medium) grated carrots
60g (2.1 oz, just under ½ cup) seedless raisins
¼ tsp vanilla extract
if you want a more traditional style carrot cake, substitute sultanas for walnuts, lime zest for orange zest (or omit the zest completely), use white flour instead of wholemeal and halve the amount of cinnamon used.

Frosting
110g (½ cup) unsalted butter, softened
400g (2¼ cup confectioner's) icing sugar
110g (4oz) cream cheese
½ tsp cinnamon
zest and 1 tsp juice of 1 lime


© Lydia, punge.blogspot.co.uk
Method
Set oven to 170°C (325°F, gas mark 3), grease and line a square / rectangular tin (I used 23cm x 23cm).

Mix the sugar, eggs and oil (using a spoon) until well combined and uniform in appearance, and lumpless. It'll have a glorious stretchy dropping consistency a la the photo here.

Slowly add the dry ingredients while stirring - stir until combined.

Finally add the carrots, raisins and vanilla extract, fold in and deposit the mixture to your tin.

Bake for 25 - 30 minutes until springy to the touch, and you can hear it fizzing.

Cool for about 5 minutes in the tin before turning out upside down onto a wire rack to finish cooling.

To make the frosting, beat the butter and the sugar until lightly combined (no more loose powder flying everywhere) then add the cheese and beat slowly.
Once the cheese has been incorporated, set the speed on high and beat until light and fluffy (but don't overdo it as it'll begin to go runny again), an finally add the juice, zest and cinnamon and beat in until just combined.

Once the cake is completely cooled, spread the frosting on top and sprinkle a little cinnamon for effect. Cut into 16 squares or 8 rectangles or a mix of both, as required.


CAAAAAAAAAAAAAAAAAAAAAKE!

© Lydia, punge.blogspot.co.uk

eggless ridonkuchoculous cake

© Lydia, punge.blogspot.co.uk

Happy Birthday Ross!

I love it when a colleague has a birthday, though the answer to "what sort of cake would you like?" is inevitably a bit boring, like "chocolate" or "carrot" (yep, carrot cake next week). Still, one cannot stand between a woman and her chocolate, and Ross, well, he does love chocolate cake.

He did at least make it interesting by specifying he wanted it to be choccy choccy chocolatey, which reminded me of salt, chilli and coffee used in chocolate to help bring out the chocolatiness of chocolate. Mmmmm, chilli.

And what better texture for a seriously chocolate cake but that of a gooey chocolate brownie?

As it happens, I haven't had the chance to stock up on eggs since the great creamy raspberry-coconut cake disaster of '13, so in my hour of need, made a banana substitution

So here it is, my eggless ridonkuchoculous (& chilli) chocolate cake. And it's easy. Yay!

© Lydia, punge.blogspot.co.uk

Lydia's Eggless Chilli Chocolate Brownie Cake
Ingredients
Batter
210g (1 1/3 cup) plain flour
2 tsp ground cayenne pepper
1 1/3 tsp baking powder
1/3 tsp baking soda
pinch salt
2 bananas, mashed
140g (2/3 cup) soft light brown sugar
40ml (2 2/3 tbsp) hot water
1½ tsp vanilla extract
60g (4 tbsp) unsalted butter (don't be tempted to use baking margarine instead - that doesn't work for brownies!
400g (2 cups) chopped chocolate (I used 200g milk and 200g dark as that's what I had, but would have preferred all dark chocolate)

Chocolate Buttercream
150g (1½ cups, just under 1½ sticks) unsalted butter, softened
210g (7.4 oz confectioner's) icing sugar, sifted
20g (3 tbsp) cocoa powder
100g (3½ oz) dark chocolate (2/3 of mine was 70% chocolate and the rest semi-sweet chocolate)
½ tsp espresso powder dissolved in 2tsp water
pinch of salt

optional: chocolate sprinkles, to decorate


Method
Preheat the oven to 140°C (275°F, Gas mark 1)
Grease (using vegetable oil) and flour a 7-8 inch round pan.
Mix the dry ingredients together and set aside.
Mix the mashed banana, sugar, hot water and vanilla extract together well. Set aside.
Melt the chocolate and butter together and combine well with the banana mixture.
Fold in the dry ingredients and deposit into your tin.
Bake for 1 hour, then leave to cool in the tin at room temperature. Once cooled, remove from the pan and refrigerate for at least an hour before cutting into two layers. It could collapse at one of these stages, don't panic, just jugsaw it back together using the buttercream.

To make the buttercream, melt the chocolate and set aside to cool a little.
Whisk the butter with the icing sugar and cocoa powder until light and fluffy.
Slowly add the chocolate to the butter while whisking.
Add the liquid ingredients and the salt, and beat to incorporate.

To assemble the cake, sandwich the layers together with some of the buttercream, smooth the rest over the top and sides, and top with sprinkles, if using.

Spicy!

© Lydia, punge.blogspot.co.uk


blueberry-mint tarts

© Lydia, punge.blogspot.co.uk

Sometimes you need a tart. This was one of those days. We has loads of blueberries to use up, and I thought they'd go well with mint. I was right.


Lydia's blueberry-mint tarts makes 10-12
Ingredients
© Lydia, punge.blogspot.co.uk
Pastry (Pate Sucree)
1 egg
210g (7½ oz) bread flour
90g (3 oz) icing sugar
1/4 tsp baking powder
105g (3 3/4 oz) butter
32g (1 1/8 oz) ground almonds
½ vanilla bean (optional)

Blueberry mint filling
250g (just under 9 oz) blueberries
handful fresh mint leaves
1 tbsp cornstarch
3 tbsp sugar

Pastry cream filling
240ml (1 cup) milk
65g (2 1/4) oz sugar
2tbsp cornstarch
3 small egg yolks (to weigh 55g, 2 oz)
35g (1 1/4 oz) butter

A few small mint sprigs to decorate


Method
For the pastry, sieve together the dry ingredients minus the almonds and cut in the butter either with a pastry cutter, a knife, of by pulsing in a food processor. When the mixture becomes mealy, add the egg and continue cutting in until the mix starts to come together, then cut in the almonds and vanilla. Once the dough has come together, wrap in cling film or in a sandwich bag and refrigerate for at least four hours.

Once the pastry dough is chilled, roll out thinly (~½ cm) and cut into circles (I used a 12.5 cm - 5 inch diameter bowl as a pastry cutter, to fit pastry moulds 8.5 cm - 3.5 inch in diameter - these were actually just egg rings. You can also use a cupcake pan as your pastry mould, cutting smaller circles to fit, approx 8 cm in diameter). At this stage, the rolled pastry will benefit from another 30 minutes in the fridge, this will make lining the tart pans with the pastry easier.
Once the tart pans are lined, cover with baking parchment and baking beans (or any dried beans) and bake at 175°C (350°F) for 20 minutes, until golden brown. Allow to cool on a wire rack. It's not necessary to prick the pastry with a fork before baking, but it doesn't hurt.

You can make the fillings after the pastry has been chilling for about 3½ hours, but if they are left too long after preparation they will set before they are ready for use.

© Lydia, punge.blogspot.co.uk
For the blueberry mint filling, mix the corn starch with the sugar and set aside. Finely chop the mint leaves and in a food processor, process with 175g (6 1/8 oz) of the blueberries till liquid. Bring to the boil in a heavy pan, then add about 1/4 of the wet mix to the dry while stirring. Once all the dry mix is incorporated, return this blend to the pan and boil while stirring for about a minute to thicken. Cut the remaining blueberries in half or quarters depending on size and gently stir into the blueberry-mint gloop. Allow to cool at room temperature until required.

For the pastry cream, place the milk and 1-2 tsp of the sugar in a heavy saucepan and bring to the boil over a low-medium heat.
While waiting for the milk to boil, mix the remaining sugar with the cornstarch and stir in the egg yolks to make a paste.
Once the milk has boiled, add 1/4 of it to the egg mixture slowly, while stirring, then return this to the saucepan and bring to the boil, stirring continuously.
Boil for 2 minutes, stirring throughout, then remove from the heat, stir in the butter until melted, transfer to a clean bowl and cover with cling film (saran wrap, rest it directly on the pastry cream) to prevent a skin from forming and keep at room temperature until use.

Once the pastry cases are cooled smooth just over a tablespoon of the blueberry-mint filling over the base. Top with the pastry cream and smooth with the back of a spoon. Allow to set in the fridge before serving, with a sprig of mint to garnish.

© Lydia, punge.blogspot.co.uk

creamy raspberry & coconut

© Lydia, punge.blogspot.co.uk

Happy Mother's Day!
And a stunningly happy birthday to mum for yesterday :)
Also, I'm gonna be an aunty again! Yay! (or, more correctly, "I'm gonna be a 10th person's aunty! yay!")

We had a wonderful family gathering at my parent's last night, and of course there was cake. I meant to make the raspberry-almond petit-four cake that I loved so much last time I made it, but found I was missing some key ingredients. Like the almonds. And marzipan. And raspberry jam. And one of the eggs.

Cue substitutions of the likes of dessicated coconut, more buttercream, strawberry and nectarine jam, and a 3/4 amount of batter recipe. I didn't let the ganache cool enough before pouring it on, and so when the big reveal came, it was suitably messy. Between mouthfuls of not-at-all piss-taking "oh wow, looks... lovely" from my delectable siblings, and the beautifully sincere yet clenched-jaw-sounding "mmmmmmm, delicious!" from dad, there was enough material to taunt me with, but as it happens, it was delicious, and the family mentioned I should upload a photo anyway ("looks real home-made!").

So here it is, another variation on the pistachio petit-four cake, and a slightly simpler one at that,

© Lydia, punge.blogspot.co.uk

Lydia's creamy raspberry-coconut cake
Ingredients
Batter
170g (6 oz, 3/4 cup) butter
110g (½ cup) caster sugar
3 eggs
225g (1½ cups) plain flour
75g (3/4 cup) dessicated coconut
2 1/4 tsp baking powder
3/4 tsp baking soda
1/4 tsp salt
2 1/4 tsp almond extract or essence

Buttercream
100g (3.6ozbutter, at room temperature
200g (generous 2 cup confectioner's) icing sugar
2 tbsp water
1 tsp vanilla extract

Ganache
220g (7½ oz) white chocolate
145ml (2/3 cup) heavy cream (I used Elmlea double light)

Bits and Bobs
scant 1 cup frozen raspberries - sorry, I don't know the grammage, about 1½ good handfulls!
6 tbsp red fruit jam (I had strawberry and nectarine jam, but any mild-tasting red-fruit jam will work well, e.g. raspberry, strawberry)
Icing sugar, edible sprinkles/sparkles/glitter, to dust (optional)

© Lydia, punge.blogspot.co.uk
Method
Preheat the oven to 160°C (300-325°F, Gas mark 2-3), line or grease (with butter) and flour an 8 inch cake pan.
Mix together the flour, coconut, baking powder, baking soda and salt, and set to one side.
Break up the eggs lightly and set aside.
Beat together the butter and the sugar.
Add the eggs in two goes, alternating with the flour / almond mixture, and mix until everything is fully incorporated.
Finally add the almond essence, give one final mix, and transfer to your patiently waiting cake tin.
Bake for 1hr and 10-15 minutes. If your cake starts to burn, decrease the heat a little (about 10-20°C) and place on a lower shelf. Bake until golden brown, the middle is firm and springy (certainly not wobbly), and you can hear a fizzing sound. To be sure, you can stick a sharp knife / knitting needle / thermometer probe in the centre - if it comes out not covered in gloop then your cake is baked.
Turn out onto a wire rack and leave to cool, upside-down.

Once cooled, cut into 2 layers. When you rebuild the cake, the top piece will be that which was the bottom of the cake when it was the oven, with the crust side facing up.

While the cake is baking you can make the buttercream and ganache.

For the buttercream, ensure your butter is soft - if not, cut unto small chunks and beat. Once softened, add the sugar and mix on slow, or with a fork or spoon, until incorporated, then beat on high speed until light and fluffy. Reduce the speed and slowly add the water and vanilla extract. Beat until just incorporated. Set aside, but don't refrigerate.

Make the ganache by chopping the chocolate and melt in a bain marie (or a heat-proof bowl over simmering water, just make sure the bottom of the bowl doesn't touch the water).

Heat the cream until it's just simmering, and stir into the melted chocolate until combined. If you make the ganache while the cake is baking then leave it at room temperature to thicken up. If you make it while the cake is cooling, put the ganache in the fridge.

To assemble the cake, spread a layer of buttercream over the bottom layer of cake, chop up the raspberries and place them on top of that layer, reserving a small handful for the very top of the cake, and pour a little (no more than about 1/4 cup) of the ganache over the top.
Spread the jam on the underside of the top layer and place on the raspberries so that the middle of your cake has buttercream-raspberies-ganache-jam going from the bottom up.
Cover the top of the cake, and smooth the edges (Particularly any gap between the layers) with buttercream, you'll get raspberry juice and ganache seeping down the sides, don't worry about this.
Finish by pouring on your slightly thickened ganache (hoping it's not still so thin that you lose all of it off the bottom of the cake!), and allow it to run down the sides.
Top with your reserved raspberries, and optionally sprinkle on some edible sparkles or icing sugar to serve.

Hopefully it'll look better than mine!


Also, because I love it so much and I'm in the mood for it, here's some Turkey Dubstep for you:


coconut-lover's cake

© Lydia, punge.blogspot.co.uk

It's that time of year again - plethora-of-birthdays-February (and commercialised-day-of-amore), and so it's giant cake time again. Nick loves coconut, beyond reasonable limits in my opinion, and when asked "what sort of cake do you fancy this year?", "coconut" was the response. He's a massive fan of bounty bars ("mounds" candy bars in the States, coconut ice topped with chocolate), which got me planning a bounty-bar-inspired cake with coconut ice and chocolate ganache.

This is a fussy, fussy cake, with many stages, and requires a fair amount of time to make (I'd allow 4-5 hours), but if this doesn't say "I love you" to the coconut-lover in your life (or, alternatively, "leave me the hell alone for 5 hours"), then maybe it's time to give up.

© Lydia, punge.blogspot.co.uk

Lydia's Coconut-Lover's Cake
Ingredients
Cake batter
220g (8oz) plain flour
300g (10 ½oz) caster sugar
1tsp baking powder
60g (2oz) dessicated (grated) coconut, unsweetened
115g (4 oz creamed coconut) + another 120ml (½ cup) coconut milk OR if you can't find creamed coconut (it comes in a rectangular block and is solid) 115g (4 oz) vegetable oil will do the trick
8 small-medium eggs, separated (if you want to be super-precise, it's 110g (4oz) egg yolks and 220g (8oz) egg whites)
140ml (halfway between ½ and 2/3 cup) coconut milk
½ tsp vanilla extract
¼ tsp cream of tartar

Coconut Ice layer
200g (7oz) condensed milk
170g (6oz confectioner's) icing sugar
170g (6oz) dessicated coconut (unsweetened)

Chocolate ganache
565g (20oz) plain / dark chocolate
410ml (1 2/3 cup) double/heavy cream

Method
Preheat the oven to 170°C (375°F, Gas Mark 3-4).

© Lydia, punge.blogspot.co.uk
melting creamed coconut
For the cake:
If using creamed coconut rather than vegetable oil, prepare it by grating the creamed coconut into a saucepan and add the coconut milk, heat gently stirring until all the creamed coconut has dissolved - it will be the consistency of soft butter, but slightly "sandy". As soon as it is done, take it off the heat to minimise liquid evaporation.

In a very clean mixing bowl and with a very clean whisk (I run boiling water over both just before using) combine the egg whites, 100g (2 ½oz) of the sugar and the cream of tartar, and whisk quickly to a medium peak consistency.

Whip the remaining wet ingredients together in a separate bowl, slowly add the sifted remaining dry ingredients (minus the grated coconut) while mixing. At this stage it should be a thick dripping cake batter consistency if it's stiffer then add water a teaspoon at a time until you're happy you can fold in the egg whites without losing too much air. Fold in the egg whites in three batches (the first addition will help to loosen the mixture a little so you keep more air in the 2nd and 3rd batches, and help prevent the overmixing and separating that adding the whites all in one go can cause) until just combined and there are no streaks, and gently fold in the grated coconut (if using) in about 8-10 strokes.

Deposit into two 8 inch cake pans (without liner or grease / flour - as a lot of rise comes from the air you've beaten into it, it needs to adhere to the pan to maintain it's height and not collapse) and bake for 40-50 minutes (mine took 45 mins) until done (springy, an inserted skewer comes out clean, and you can hear a slight fizzing sound. It should also smell like cake!). Cool for about 10 minutes in the tin, inverted, on a wire rack, then remove the sides and finish cooling (inverted) on the rack. This should ensure a flat top. When completely cool, gently remove the base using a flexible spatula or similar.

While the cakes are baking, prepare the ganache that will be whipped and used like a buttercream between the cake layers and as a smoothing coating on the outside of the cake underneath the smooth, poured ganache. Grate/shave/very finely chop 340g (12oz) of the chocolate and set aside in a bowl (you can also roughly chop it and pulse it in a food processor until fine, being careful not to let it melt by processing for too long). Heat 250ml (1 cup) of the cream in a heavy-bottomed pan over a medium heat, stirring to prevent burning, until it starts boiling. Pour the cream over the chocolate and let stand for a minute, then stir until smooth. Chill in the fridge until it thickens up, but not solidifies, about 30 minutes. Whip until it resembles mousse (if it's not whipping up then it probably needs to chill a little longer) then keep at room temperature until the cakes are cooled and ready to be assembled. Whip it briefly again just before use to loosen it up a bit.

Once the cakes are out of the tins, line the bottom of the tins with come baking parchment/greaseproof paper and prepare the coconut ice layers. Mix the condensed milk with the icing sugar and stir in the grated coconut. You'll need either the paddle attachment on a standing mixer, or a wooden spoon, as it's a VERY stiff mixture. Deposit half into each of the prepared tins and push down first with your fingers, then with the back of a metal spoon, wetted to prevent sticking. Keep in the tin until ready to use.

To assemble the cakes, cut each cake layer in two so you will have 4 layers, and trim the tops if they are domed so you end up with 4 even layers.

Place the top of the first cake upside-down on your surface (plate/chopping board or serving plate if you're not worried about it getting messy) - the top of one cake is now your base and the base of the other cake will be the top of your finished cake.

Smooth a thin layer of whipped ganache onto the sponge, release the coconut ice from the pan and place, inverted, on top of the cake layer, peel off the paper and smooth another thin layer of ganache on top of the coconut ice.

Place the other half of the first cake on top, and cover with a slightly more generous (~½ cm thick) layer of ganache.

Repeat the process with the other cake, and then smooth the remaining whipped ganache around the side of the cake to form a smooth surface.

Chill in the fridge for about 30 minutes.

Prepare the pouring ganache the same way as before, using the remaining 225g (8oz) chocolate and 160ml (2/3 cup) cream, and while runny, pour over the cake and smooth with a palette knife, covering all surfaces. Allow to set slightly at room temperature before serving.

© Lydia, punge.blogspot.co.uk

stollen-inspired yule log

© Nick Loven© Lydia, punge.blogspot.co.uk

Chrimbob!
Ahh, I do love Christmas, the spices, the family time, the cosy. All lovely.

For the past few years I've meant to make a yule log, but as Christmas got closer, I somehow managed to forget. This year I've remembered, but I've also remembered something which will come across as a bit of a confession: I don't like chocolate cake. Sacrilegious I know, but in general I find chocolate cakes disappointing - too often it doesn't taste of chocolate, and can be incredibly dry, relying far too heavily on an over-rich frosting for the taste and the moisture. Even then, to me it just tastes of "sweet", not choc.

So rather than make a traditional chocolatey choccy choccy yule log I decided to make a Stollen-inspired log. For those of you that don't know Stollen, it's a yeast-based fruit bread/cake, often laced with marzipan, which originates from Germany and is the epitome of Christmas-in-your-mouth as far as I'm concerned. I paired it with a variation of the buttercream I made for the warm spice cake, which was chai-inspired, only this time without the tea, which seemed Christmassy as it's full of cloves, ginger and cinnamon, and also a pinch of pepper.

Here it is, a marzipan-laced no-flour swiss roll/roulade with Stollen fruit and a smells-like-christmas (and, interestingly, chai latte) buttercream. Enjoy!

© Lydia, punge.blogspot.co.uk

Lydia's Stollen-Inspired Yule Log - serves about 16
If you want a 1 swiss-roll tin amount for 8ish people, halve the quantities and bake for 20 minutes
Ingredients
Roll
12 eggs, separated
300g (1 1/3 cup) caster sugar
100g (1 scant cup) ground almonds
2 tsp vanilla extract
50g (2 oz) glacé cherries (about 8 cherries), chopped,
100g (4 oz) mixed peel
     or substitute the cherries and peel for a dried fruit mix with sultanas and mixed peel

Filling
650g (23oz) marzipan
375g (scant 2 cups confectioner's sugar) icing sugar plus extra for dusting
250g (2 1/4 sticks, 9oz) unsalted butter, softened
1 tbsp ground cinnamon
1 tbsp ground ginger
1½ tsp ground cloves
1½ tsp ground black pepper - it should still look flecky and black, not so finely ground that it's brown - if you only have finely ground pepper, use about ½ to 2/3 of the amount stated here.
pinch of ground star anise (optional)
1 tsp vanilla extract

You'll also need 2 swiss roll tins (about 30 x 20cm - 12 x 8 inches) , or one 30 x 30cm square tin for the 16-serving amount.

© Lydia, punge.blogspot.co.uk

Method
Preheat the oven to 170°C (375°F, Gas Mark 3) and line a 30x30cm square tin, or 2 swiss roll tins with baking parchment.

Clean your whisk and bowl thoroughly to ensure no fat is present (which will stop the egg whites from foaming properly) - I usually do this by swilling boiling water in the bowl and over the whisk attachments, but you can also rub a sliced lemon over the surface, then dry with a clean towel.

Whisk the egg whites until very light and fluffy, then add 100g (just under half a cup) of the sugar while whisking. Continue whisking just until you have peaks that can stand alone.

Whisk the yolks with the remaining sugar until very light, fluffy and foamy, then fold in the almonds, vanilla extract, fruit and about a quarter of the egg white mixture.

Fold in the remaining egg white mixture delicately, in about 3 batches, being careful not to beat out the air you've incorporated. Pour into the prepared tin(s) and smooth into the corners.

Bake for 25-30 minutes in the large square tin or (20-25 minutes in swiss roll tins) until golden and springy, and a knife inserted in the middle comes out clean.
Leave in the tin for about 5 minutes then turn out onto baking parchment dusted well with icing sugar, gently peel off the parchment the cake was cooked on, and cover the cake with a clean towel.

To make the buttercream, cream the butter with the sugar until light and fluffy. Beat in the spices and vanilla extract, along with 2 tbsp water to help lighten the mixture a little.

© Lydia, punge.blogspot.co.uk
To assemble the log, when cooled, trim the edges off the cake and spread with a thin layer of buttercream.

Separate 150g (about 5oz) of marzipan from the rest and set aside. Roll out the rest of the marzipan to form a sheet and place on top of the buttercream layer.

If using swiss roll tins, turn the cakes so the short sides are closest to you (and you're looking at the cakes in portrait orientation) - if you're doing a half batch using only 1 tin, lay the cake so a long side is closest to you, landscape orientation.

Roll the remaining marzipan to a sausage shape the length/width of your cake (short side if you've used 2 swiss roll tins with 75g (about 2.5oz) marzipan per 1 tin's-worth of cake, long side if you're making a half-batch with 1 swiss roll tin) and lay on the cake closest to the edge facing you. When rolled up, this will form a marzipan core.


To make the roll, fold the cake edge closest to you, away from you, using the marzipan sausage as leverage. Using the baking parchment, tightly roll the cake away from you and when you get to the end, firmly squeeze it to help it keep it's shape.

© Lydia, punge.blogspot.co.uk
If using 2 tins, join the ends of your two rolls together with buttercream to form one long roll.

Cut the last third off your log at roughly a 60° angle, place the log on your serving plate with the seam on the bottom, and join the cut third to the main log about half way up, using buttercream on the angled, cut portion, to form a branch. I also cut a chunk off the main log near where the previous cut was made and turned it round so the branch end was straight again, but this is not really necessary.

Cover with the remaining buttercream and score bark shapes and tree-rings into it using the blunt edge of a butter knife, or a knitting needle.

Top with a dusting of icing sugar, and place in the fridge to set nicely until munch-time.

© Nick Loven© Lydia, punge.blogspot.co.uk

Noah's First Ark


© Lydia, punge.blogspot.co.uk

I’ve been working on a cake for some friends of ours whose son turns one in a few weeks. His name is Noah, and what cuter way to celebrate with a Noah’s Ark cake? I was thrilled to be asked to make one for them, I’ve always wanted a good reason to have a go at this much-loved theme, and there are some amazing versions out there! (like this one from "make me studio", also for a first birthday, and this phenomenal one, made for the threadless tees 2009 cake contest). I didn’t want to go down the fondant-covered boat route, as though it looks very very cute, shaping fondant around an awkward shape isn’t something I’ve had that much practice with, and in my experience, if not done perfectly, it can look very shoddy indeed. Also, in my experience (well, at any rate, my mum always did this, not that I was hyper or anything…), parents don’t like their kids to eat too much fondant, so the fondant gets taken off and left, and I hate (expensive) waste, so butter cream it was, with a relatively simple ark shape and animals made out of fondant and/or marzipan, with a few quirks thrown in. Noah’s dad is about as much of a geek as Nick is, and so I had planned to put lots of cute sci-fi tid-bits in there, but the problem with daleks and Cthulu is that they tend to be detail-heavy and thus rather time consuming. So I settled for some waterskiing penguins and some angry birds. 

© Lydia, punge.blogspot.co.uk

This cake was designed to “feed” 24-30 people, but I have to say it’ll be tight, with quite small pieces each. Which is probably just as well as the recipe I used turned out a rather dense, very moist banana cake with some incredibly sweet toffee butter cream. Yep, banoffee cake, courtesy of Fiona Cairn’s “The Birthday Cake Book”. If I could do it all again, I’d have chosen a cake that rises more and have a full round cake under the ark portion, but realising this at 8pm on the Sunday of delivery, when there’s no more butter in the house, is the most hopeless time for action.


© Lydia, punge.blogspot.co.uk

I used 3 times the recipe quantity for one cake, and baked it in a 30cm x 30cm tin (the full size of the Silverwood multisize foldaway cake pan) adding 15-or-so minutes to the baking time, but doing it in several round tins and sticking with the original timings will work just as well, if not slightly better. If you make it with a different recipe (pretty much any other recipe – banana cake is notoriously dense and doesn’t rise very much) then these quantities of cake should easily be enough for 30 people, in my opinion.


© Lydia, punge.blogspot.co.uk


© Lydia, punge.blogspot.co.uk
I wanted quite a lot of butter cream and cake layers so I cut the cake into 2 layers and sandwiched them back together with the butter cream. I then cut 10cm off one end of the cake for the top of the ark and cut the remaining block in half to give two 20x15cm rectangles and carved both into a basic boat/ark shape. I sandwiched one ark shape to the other with more butter cream, to give a basic boat shape with four cake layers, and carved them so that the bottom of the boat was narrower than the top. I then trimmed half of the 10cm off-cut to fit comfortably as the boxy cabin on top of the boat shape, and covered the remaining off-cut with butter cream as an additional, “behind the scenes” cake for serving. This is one of my gripes with character cakes – I’m not good at carving shapes without wasting a massive amount of cake! The ark was affixed to a cake drum, and the cake drum to a plate, both with a good blob of butter cream.

© Lydia, punge.blogspot.co.uk

To the rest of the butter cream I added an inordinate amount of cocoa powder and a smidge of black food colouring paste to get a dark wood colour. The ark was then coated in three layers of butter cream, with a good half hour to an hour in the fridge between each layer, and finally smoothing the whole thing off with a wet palette knife. Using the blunt side of a butter knife and virtually no pressure, I then scored lines along the surface of the whole ark for wood panels, and, using a toothpick, scored rivet holes at what would be the joints of the panels. 


For the water, I whipped up a quick batch up butter cream (80g unsalted butter at room temperature whipped with 160g sieved icing sugar until light and fluffy), coloured it with blue food colouring paste, applied it around the boat and over the edges of the cake drum. And finally spent a good few hours rolling animal shapes out of fondant/marzipan coloured with food colouring paste, fixing any “bits” of animals to other bits (e.g. the elephant ears to the elephant head, or the orange spots to the yellow giraffe-head) using water, and affixing the characters to the ark either by pressing them into the butter cream (one of the advantages of a butter cream covered cake), or with the aid of a wooden skewer/dowel for the giraffe and elephant heads. The water-ski-rope for the penguins is a chopped skewer pushed into the cake, and the skewer for the water-ski handle is pushed into (ouch!) the penguin wings for balance.


© Lydia, punge.blogspot.co.uk

For a final touch, I cut out a thinly-rolled rectangle of icing for a number plate, wrote on it using an edible-ink decorating pen (with which I also did the animal’s eyes), and stuck it to the back of the boat with a little water.

© Lydia, punge.blogspot.co.uk

Tah-dah! 

© Lydia, punge.blogspot.co.uk

boozy baked apples


© Nick Loven


Once again we got to the end of a phenomenal Sunday roast to find that our omission of dessert-making was, in fact, a mistake. Having had a delicious pork belly (thanks Nick for patiently cooking while I went round the flat in a flurry of "making" - placing and stocking the bookcase I'd repainted, cutting and sanding a palette to repurpose it as a shoe-rack, and painting a lampshade to warm the corridor light) roast and a bottle of wine (plonkwedronk.blogspot.co.uk) we attacked the kitchen for emergency dessert. With pork belly in our bellies, apples were calling, and so a bake with pre-made, frozen pastry dough came into rapid existence.

If, like me, you tend to make too much pastry dough and keep it in the freezer, you can get away with calling this an emergency dessert, but I appreciate that not everyone accidentally makes too much dough and has it handily waiting in the freezer, so for you more organised sorts, here's a baked apple dessert where the apples stay quite crisp, the pastry melts to a texturally pleasing doughy gloop, and slightly burned raisins top off a hearty, food-filled day.

© Nick Loven


Lydia's Boozy Baked Apples
Ingredients
4 eating apples - we used Gala
1 tbsp ground cinnamon
1/4 tsp ground cloves
2 tbsp dark brown sugar
1/4 cup raisins
1 tbsp rum (dark rum would be best, but we only had white)
250g shortcrust pastry, bought or homemade, frozen. (if making, see below)

Pastry - will make 400g, you only need 250g, but really it's up to you if you want to use it all!
1 egg
7½ oz (200g, 1 1/3 cup) bread flour
3 oz (80g, just under ½cup ) confectioner's / icing sugar
¼ tsp baking powder
3 6/8 oz (100g, 1 stick) butter, chilled
1 1/8 oz (30g) ground almonds / almond flour


© Nick Loven

Method
If you're making the pastry, sift the flour with the sugar and baking powder. Add the butter and blend in using an electric whisk / standing mixer on slow, or cut in with a knife or pastry cutter, until the mixture resembles breadcrumbs. Add the eggs and continue mixing until the dough begins to come together, then add the ground almonds and mix until the dough comes together. Bring it together to a ball and wrap in cling film (saran wrap) and freeze. If you don't have time to freeze this you can just cut chunks off instead of grating it when it comes to topping your dessert.

Preheat the oven to 200°C (400°F, Gas Mark 6).
Place the raisins in a small bowl and top with the rum.
Slice the apples finely and place in an ovenproof dish approx 20cm x 10cm.
Top with the cinnamon, cloves and sugar.
Grate the frozen pastry and place on top of the apples, and top with the rum-soaked raisins.
Drizzle any remaining rum over the top.

Bake for 10-15 minutes, until the raisins are slightly singed and the pastry has melted a little.

Serve with custard, cream or ice cream. Boozy apply doughy nom nom.


© Nick Loven